For adventurers dreaming of Africa’s rooftop, planning your 7 day Machame route itinerary is the exciting first step. This guide is your quiet, practical companion. It will walk you through every single day. You will learn what to truly expect. We prepare you not just for the climb, but for the whole experience. We’ll cover the path, the camps, and the feelings. We’ll also share the smart decisions that lead to the summit. Our goal is simple. We want to replace uncertainty with clear, calm confidence. Let’s begin.
You might hear the Machame Route called the “Whiskey Route.” This nickname is not about drinks on the mountain! It started as a playful contrast. The easier Marangu route was called the “Coca-Cola Route.” The idea is simple. Marangu was seen as the smoother path. Machame is steeper and more challenging. It was considered the stronger, more robust choice. That is like whiskey compared to cola. The name stuck because it hints at the route’s character. It is adventurous and scenic. It asks a bit more from you. But the reward is a richer experience. You journey through the mountain’s most beautiful landscapes. This makes it the most popular path for good reason.
Your 7 day Machame route itinerary is a carefully designed story of ascent. It follows a “climb high, sleep low” pattern. This pattern is key for letting your body adjust to the altitude. So, you will hike to a higher point during the day. Then, you descend slightly to sleep at a lower camp. This method helps your body adapt safely. Over seven days, you will walk about 62 kilometers (38.5 miles). You pass through five completely different climate zones. You start in a lush rainforest. You finish in an Arctic desert at the summit. Each day has a specific purpose. It builds your strength and acclimatization step by step. It never rushes. This is a journey of patience and gradual triumph.
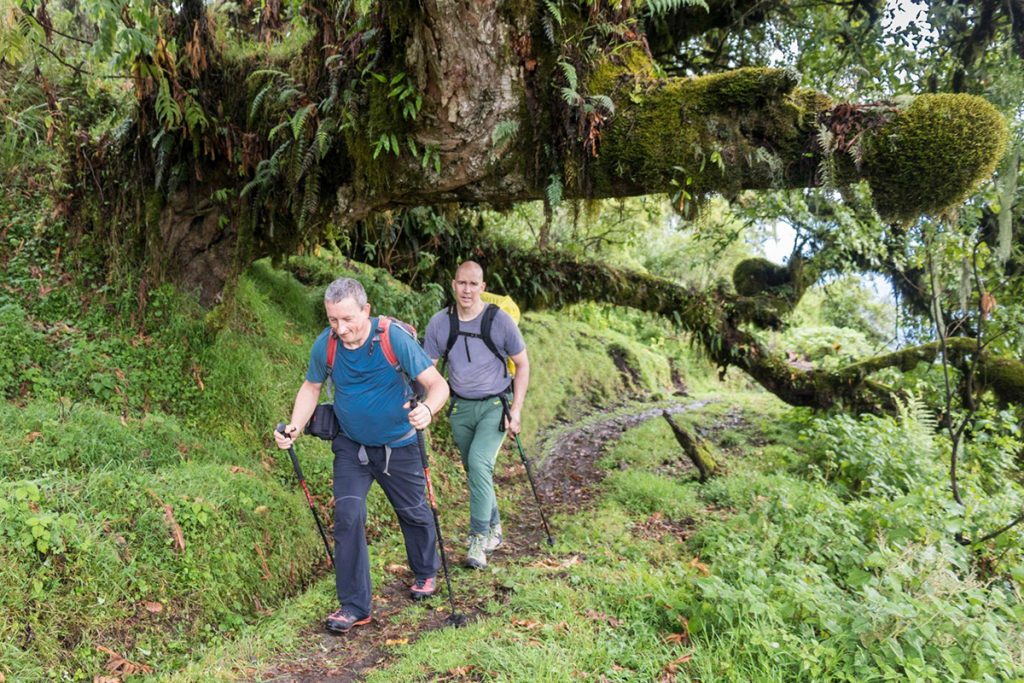
Your first day is full of excited energy. You begin at the Machame Gate, around 1,800 meters. After registration, you step onto the trail. Then, you immediately enter the magnificent rainforest. The air is humid and fresh. The path is a steady, muddy climb under a thick green canopy. You might see blue monkeys. You might also hear exotic birds. The hike to Machame Camp (2,980 meters) takes about 5 to 7 hours. It is a good, solid introduction to trekking. You will feel the weight of your daypack. You will also feel the rhythm of walking. Arriving at camp, you get your first view above the trees. The mood is friendly. You share this new experience with your team and other climbers. You settle into your tent. Now, the whole adventure is truly ahead of you.
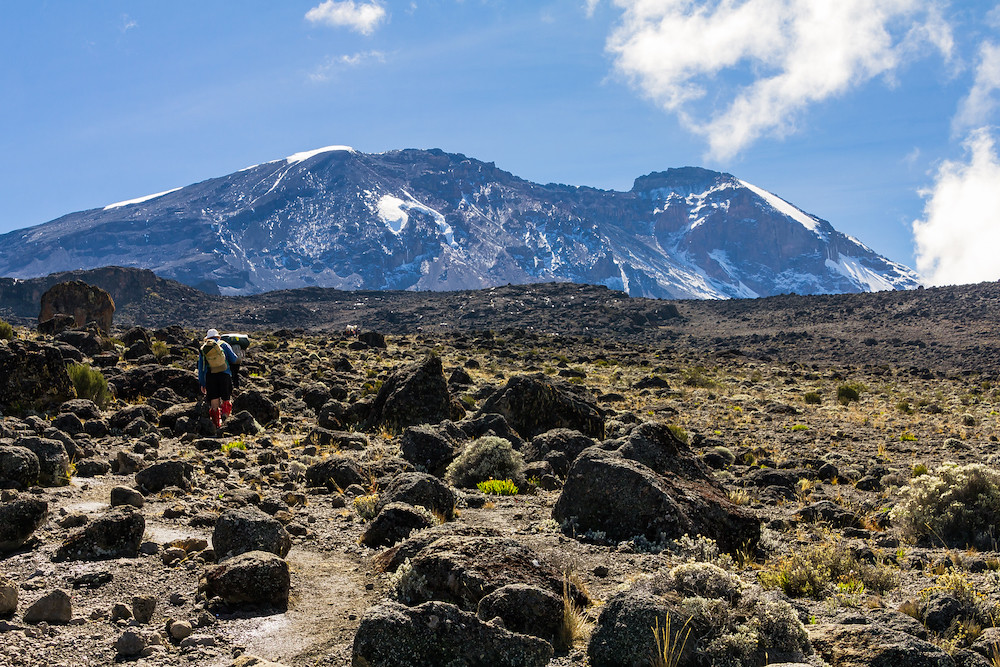
Today, you leave the rainforest behind. The trail becomes steeper and rockier. You move into the heath and moorland zone. You will see giant heather plants. You will also see strange, ancient-looking groundsels. The hike is shorter but steeper. It takes about 4 to 6 hours to reach Shira Camp at 3,840 meters. This is where you often feel your first real feeling of altitude. You might feel a little more out of breath. The key is “pole pole” (pronounced po-lay po-lay). This means “slowly, slowly” in Swahili. Listen to your guide. The reward is stunning. Shira Camp sits on a high plateau. You arrive above the clouds. You get your first wide, breathtaking view of Kibo, the summit peak. It looks majestic. Suddenly, it feels very real.
This is a critical day for acclimatization. It is a true test of the “climb high, sleep low” method. You start from Shira Camp. Then, you hike upwards towards the iconic Lava Tower. This is a massive rock formation at 4,630 meters. Reaching this high point is a big achievement. You will feel the thin air and the cold. You have lunch here. This gives your body a crucial lesson in functioning at high altitude. But you do not sleep there. Instead, you descend over 600 meters. You go to the beautiful Barranco Camp at 3,900 meters. This descent is a gift. It helps your body adapt. It also reduces the risk of altitude sickness. The camp is set beneath the dramatic Barranco Wall. You will tackle that tomorrow. Today builds your confidence.
Many people look forward to this day. After breakfast, you face the famous Barranco Wall. It looks intimidating. It is a steep scramble of rock. But it is more fun than fear. You will use your hands at times. You pull yourself up on solid rock. It is not technical climbing, but it requires focus. You need steady movement. Your guides are experts here. They show you every safe handhold and foothold. Reaching the top brings a huge sense of joy. You also get incredible views back down the valley. After the wall, the trail has rolling ups and downs. It crosses a rugged landscape to Karanga Camp at 3,995 meters. This shorter day takes about 4-5 hours. It allows your body to rest. You continue adapting before the final push.
Karanga to Barafu Camp is a short but steep hike. It takes 3 to 4 hours. You are climbing to your high base camp. Barafu means “ice” in Swahili. You will feel the environment change dramatically. The landscape is rocky, alpine desert. The air is noticeably colder and thinner at 4,673 meters. The purpose of this day is simple. You arrive, eat, hydrate, and rest. You will have an early dinner. Then, you try to sleep for a few hours. Your guide will check your health. They will also prepare you for summit night. You organize your summit gear. You need warm layers, a headlamp, and water. The atmosphere is focused and quiet. Everyone is thinking about the midnight start. You go to bed early. You know the biggest challenge begins very soon.
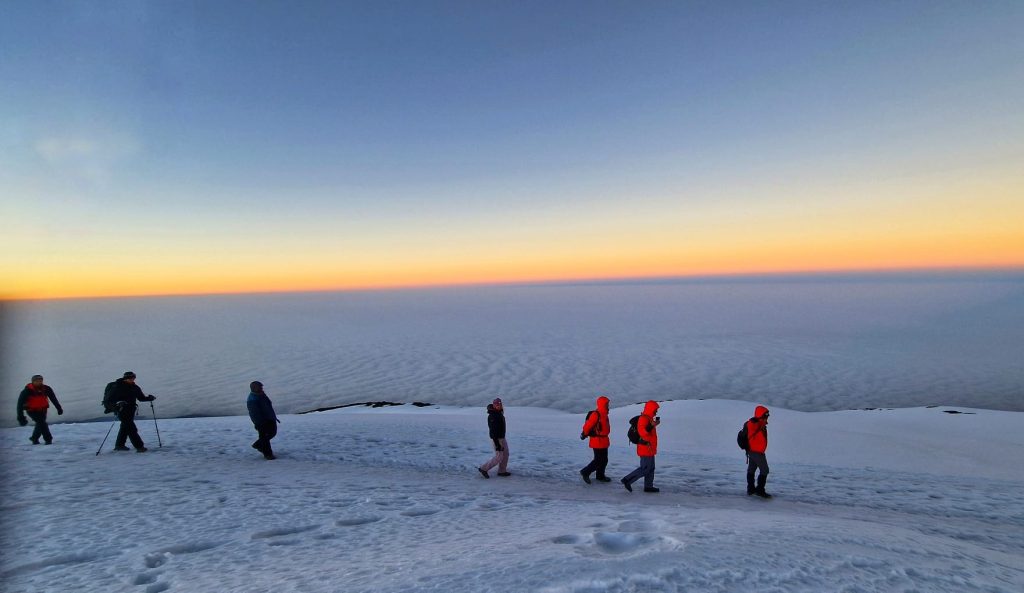
This is it. You wake around 11 PM. It is dark and very cold. After a hot drink and a final gear check, you start walking by headlamp. The goal is to climb 1,300 meters to Stella Point on the crater rim. Then, you go to Uhuru Peak. This is the highest point in Africa at 5,895 meters. This is the hardest mental and physical challenge of your life. You walk “pole pole” in a slow, single-file line. The only sounds are breathing and crunching footsteps. The six to seven hour climb tests everything you have. Reaching Stella Point at dawn is emotional. The final walk to Uhuru Peak is pure magic. The sun rises over the clouds. You celebrate and take photos. Then, you begin the long descent. You go all the way down to Mweka Camp at 3,080 meters. It is a day of extreme effort. It is also a day of supreme reward.
The final day is a gentle descent through the rainforest. Your legs might feel tired, but your spirit is light. The hike down to Mweka Gate takes about 3 to 4 hours. The gate is around 1,640 meters. It is a time for reflection. You receive your official summit certificate at the gate. This is tangible proof of your achievement. You say heartfelt thanks to your crew. You also say goodbye to your incredible guides, cooks, and porters. Their support made your success possible. Then, you drive back to your hotel in Moshi or Arusha. A hot shower has never felt better. You did it. The 7 day Machame route itinerary is complete. It leaves you with memories and pride. You also have a new understanding of your own strength.
Understanding how Machame fits among other routes helps you see its value. Compare it to the Marangu route, or the “Coca-Cola Route.” Machame is steeper and uses tents. But it has much better success rates. Its longer itinerary allows for proper acclimatization. The scenic Lemosho route is similar to Machame. However, it starts further west. It is often less crowded initially. Then, it joins the Machame trail later. The remote Rongai route approaches from the north. It is drier, but it has less varied scenery. The tough Umbwe route is very steep and direct. It is best for experienced climbers. The long Northern Circuit has the highest success rate. But it takes 9 days. Machame strikes a perfect balance. It offers incredible scenery and a challenging but manageable climb. It also provides excellent acclimatization. You can do it in a week. This makes it the most popular and reliable choice for many adventurers.
The success rate is very high. It is often estimated at 85% or more. The extra day is the key. It provides critical time for your body to adjust. This makes summit day much more achievable.
It is challenging but doable. You need good physical shape and determination. It is not a technical climb. But it is a sustained high-altitude trek. The “Barranco Wall” is more fun scrambling than dangerous climbing. The biggest challenge is managing your energy. You also must listen to your body and guide.
As the most popular route, it can be busy. This is especially true at the lower camps. However, the trail is well-managed. The sense of camaraderie often adds to the experience. Routes like Lemosho are quieter if you want solitude.
It is famous for its diversity. You walk through five distinct worlds. These include lush rainforest and Arctic summit zone. The views from Shira Plateau are breathtaking. The climb up the Barranco Wall is also uniquely beautiful.
This technique is the best natural way to prevent altitude sickness. You expose your body to a higher altitude. Then, you descend to sleep. This triggers your adaptation mechanisms safely. It builds your resilience for summit night.
The main rainy seasons are April-May and November. They make the trail very muddy and slippery. The views are often covered by clouds. It is possible, but the drier months offer a more pleasant experience.
You need good cardiovascular endurance and leg strength. The best training is hiking with a pack on hills. Also, do regular running or cycling. Being mentally prepared for long days is equally important.
It can be well below freezing. Temperatures often sit between -10 to -20 Celsius with wind chill. This is why proper gear is non-negotiable. You need a quality four-season sleeping bag and a down jacket.
Your guides are trained to spot the early signs. They will monitor your health daily. The standard protocol is to descend if symptoms become serious. The itinerary itself is designed to minimize risk. So, choose an operator with a strong safety policy.
The 7-day itinerary includes an extra acclimatization day. This extra day is a strategic pause. It significantly increases your chances of reaching the summit. You will also feel stronger when you do.
“`